How to Create
This section explains how to create new waiting rooms.
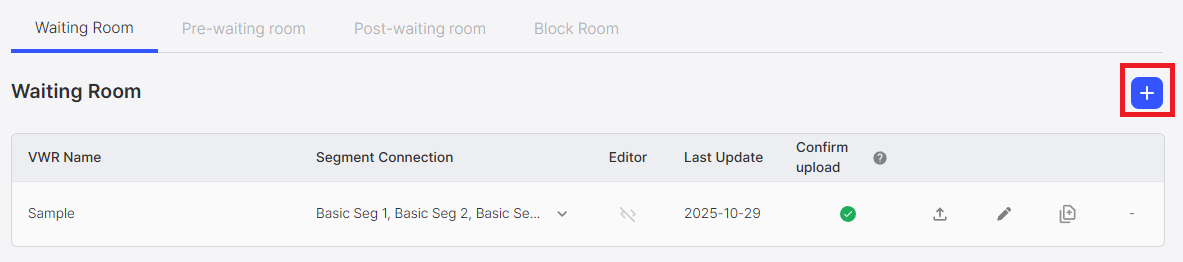
Step 1: Click Create Button
Click the Create Button (+ button) in the top right of the waiting room management screen to create a new waiting room.
Step 2: Set Waiting Room Information
Clicking the create button navigates to the creation screen for that waiting room type.
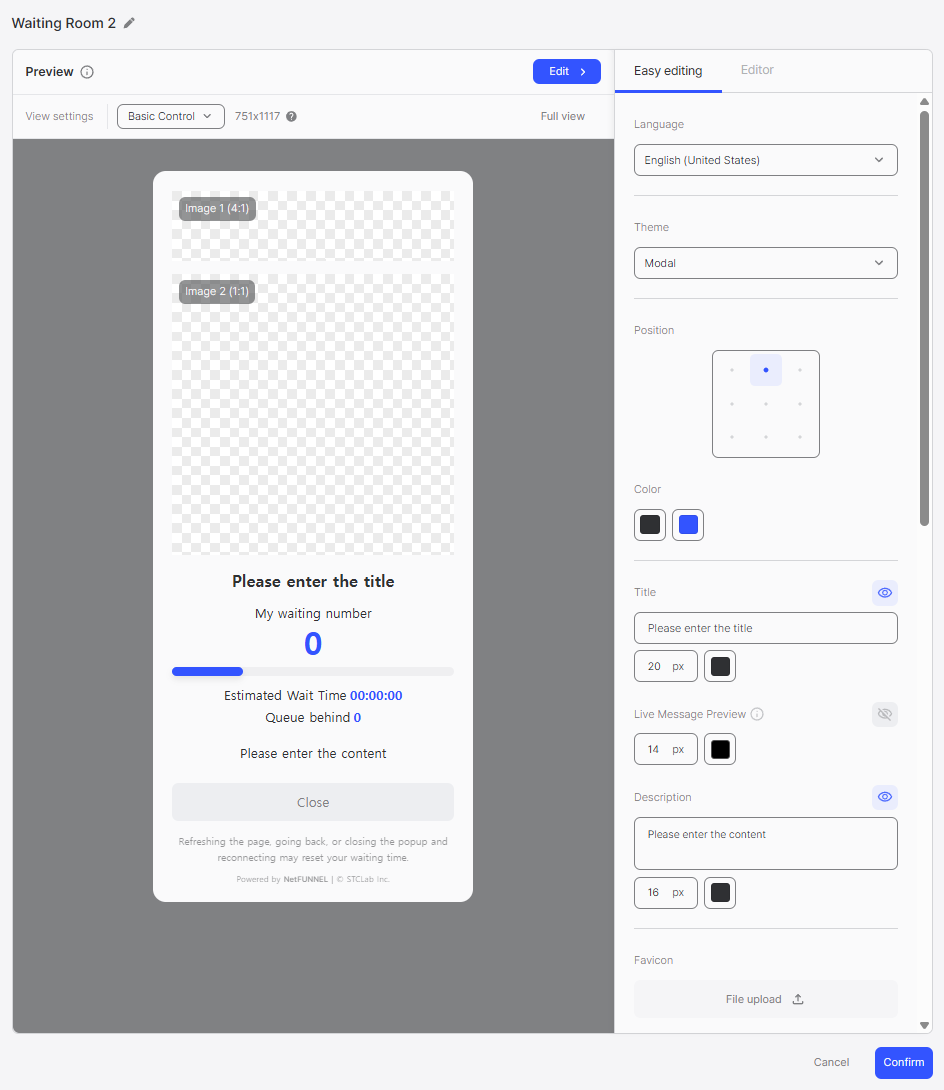
On the creation screen, you can perform the following actions:
- Set Waiting Room Name: Enter the name of the waiting room (maximum 50 characters)
- Design Settings: Customize the waiting room design
- Confirm: Click the Confirm button to create a new waiting room
Step 3: Confirm Creation
Click the Confirm button to complete the creation. The new waiting room will be created and appear in the list.
Creation Rules
Automatic Naming
When created, names are automatically assigned in the format {{Waiting Room Type}} 1, {{Waiting Room Type}} 2.
Examples:
- Waiting Room 1
- Block Room 1
- Pre-waiting Room 1
Numbering Rules
The numbering of the newly created waiting room is generated as the next number after the largest number among that waiting room type.
Example:
- If Waiting Room 4 exists
- Create new → Waiting Room 5 is created
When using NetFUNNEL SaaS, there are limitations on the total number of waiting/block rooms that can be created per plan. The number of waiting rooms that can be created may vary depending on the plan.
Initial State
When a project is first created, both Waiting Room and Block Room have 'Sample' waiting/block rooms automatically created.
Sample waiting rooms:
- Name can be modified
- Cannot be deleted