Schedule Reservation
Schedule reservation is a management tool that allows you to switch waiting room types according to the timeline of a specific event, or automatically change the admission limit for the service. When you reserve a specific waiting room state and admission limit value at the transition point, the system manages the user flow step-by-step at the promised time and automatically executes complex traffic control scenarios. You can find the [Schedule reservation] tab next to [Segment settings].
Overview
Events that are expected to generate large traffic are not simply divided into just two moments: "start" and "end". Server load begins before the actual event time and ends much later, so measures to precisely distribute load by time period are essential. NetFUNNEL helps you precisely control the way users wait and server stability as intended by the operator, across the processes before and after the event.
By setting up pre-waiting room, main waiting room, and post-waiting room consecutively through the NetFUNNEL schedule reservation system, users experience seamlessly from the pre-event area where they check announcements and countdowns, to the main event where queue management is performed, and the post-event space for additional marketing. Without requiring the operator to manually change settings in real time, the system automatically switches the waiting room state according to predefined scenarios.
By utilizing the admission limit reservation feature, you can smoothly control server traffic inflow by time. If you reserve different concurrent user limits by time period, NetFUNNEL adjusts server thresholds according to the scenario without requiring the operator to wait in real time. For example, if an event starts at 8:00, reserve the admission limit to be 100 at 7:30. Reserve the pre-waiting room to run at 7:45, and at 8:00 sharp, reserve the admission limit to be 10 and the waiting room to switch to the main waiting room through consecutive reservation, allowing you to control user waiting experience and server load step by step.
Schedule Reservation works only when the segment is in Waiting mode; it does not work in Block mode.
Roles
NetFUNNEL offers three waiting room types as follows.
Pre-waiting room
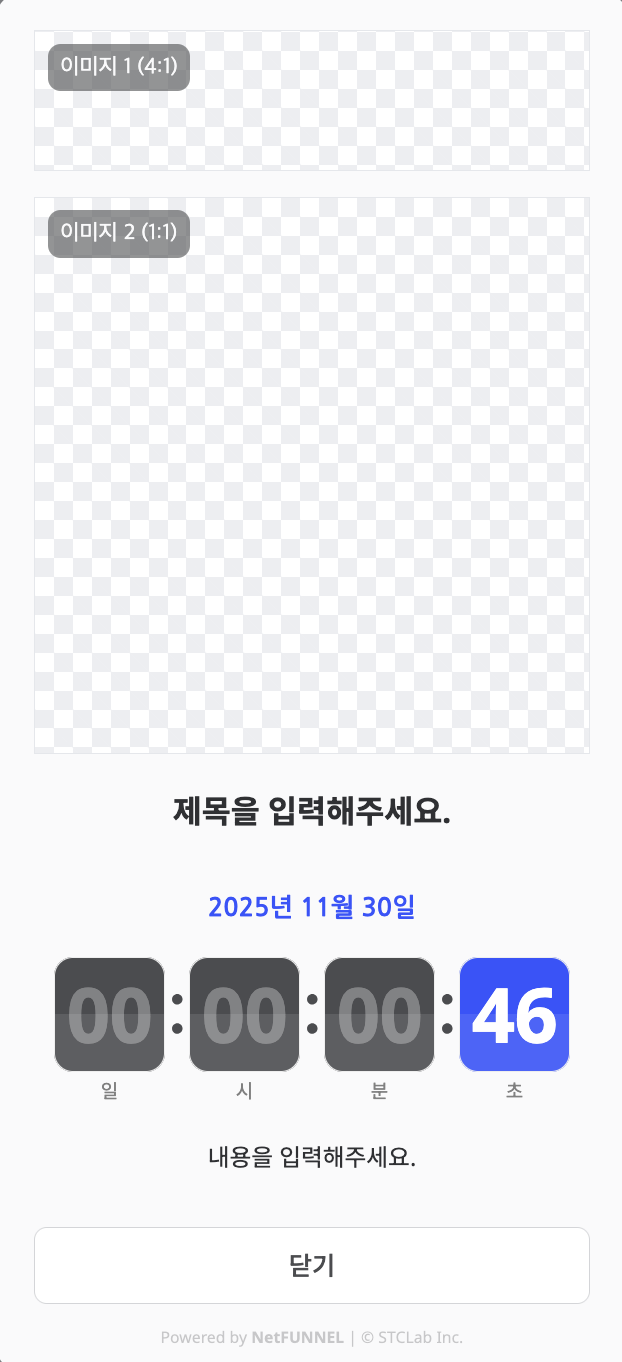
Before the event
No queue numbers
Announcements and countdown
Main waiting room
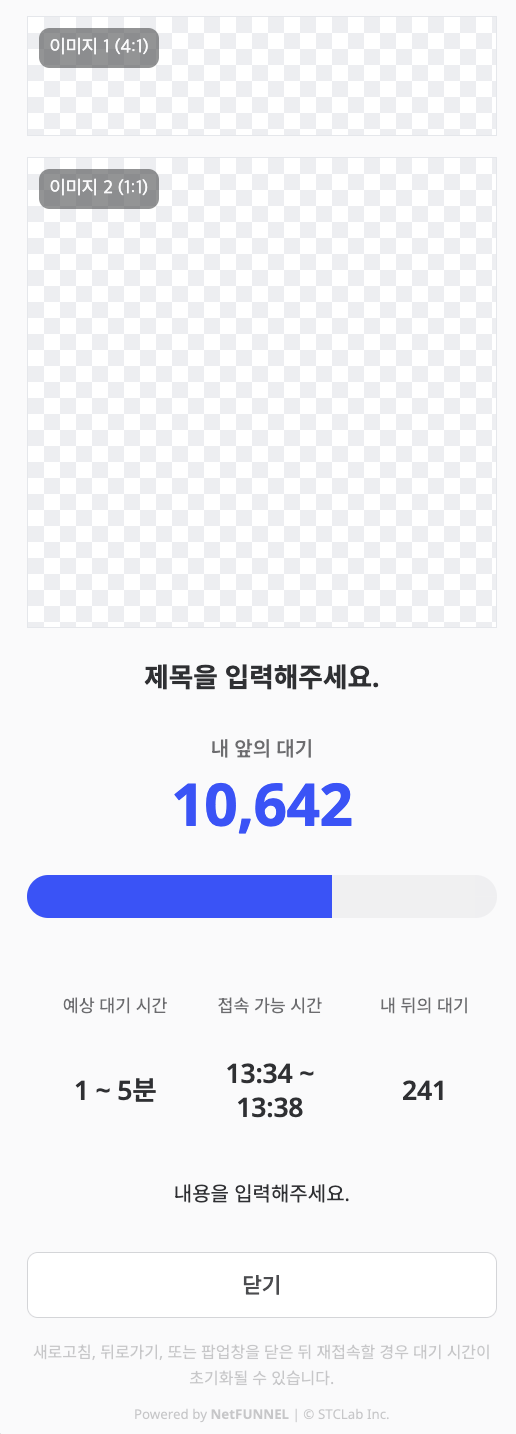
During the event
Queue numbers and wait time
Entry system
Post-waiting room
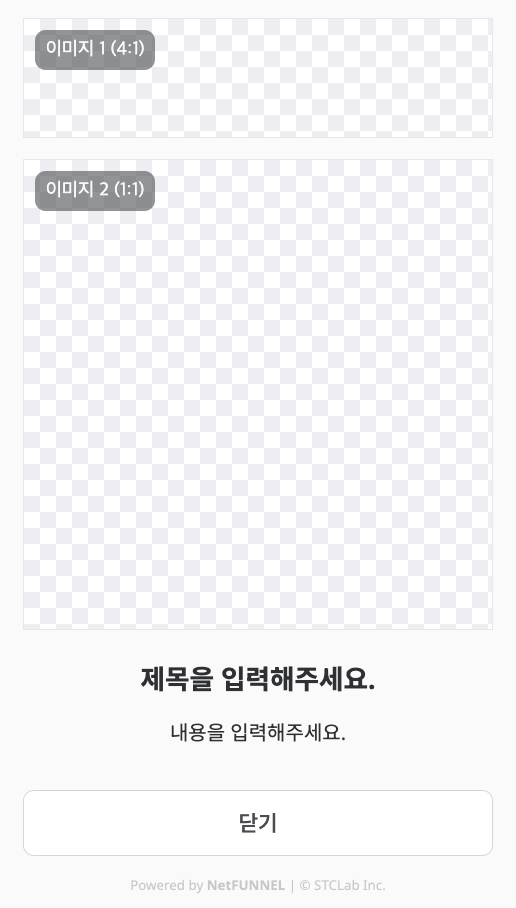
After the event
Marketing content
Redirect buttons
How it works
The system automatically switches waiting rooms according to reserved schedules. When you reserve a waiting room that matches the event schedule, that waiting room activates at the configured execution time. The recommended order is generally pre-waiting room, main waiting room, and post-waiting room. Each waiting room switches automatically at its reserved execution time; if there is no other schedule, the current state is maintained.
The pre-waiting room must be configured together with the main waiting room.
Schedule registration
Go to the segment edit screen and move to the Schedule reservation section.
Click the desired time slot on the central timeline, or click [Register new schedule] to add a new waiting room schedule.
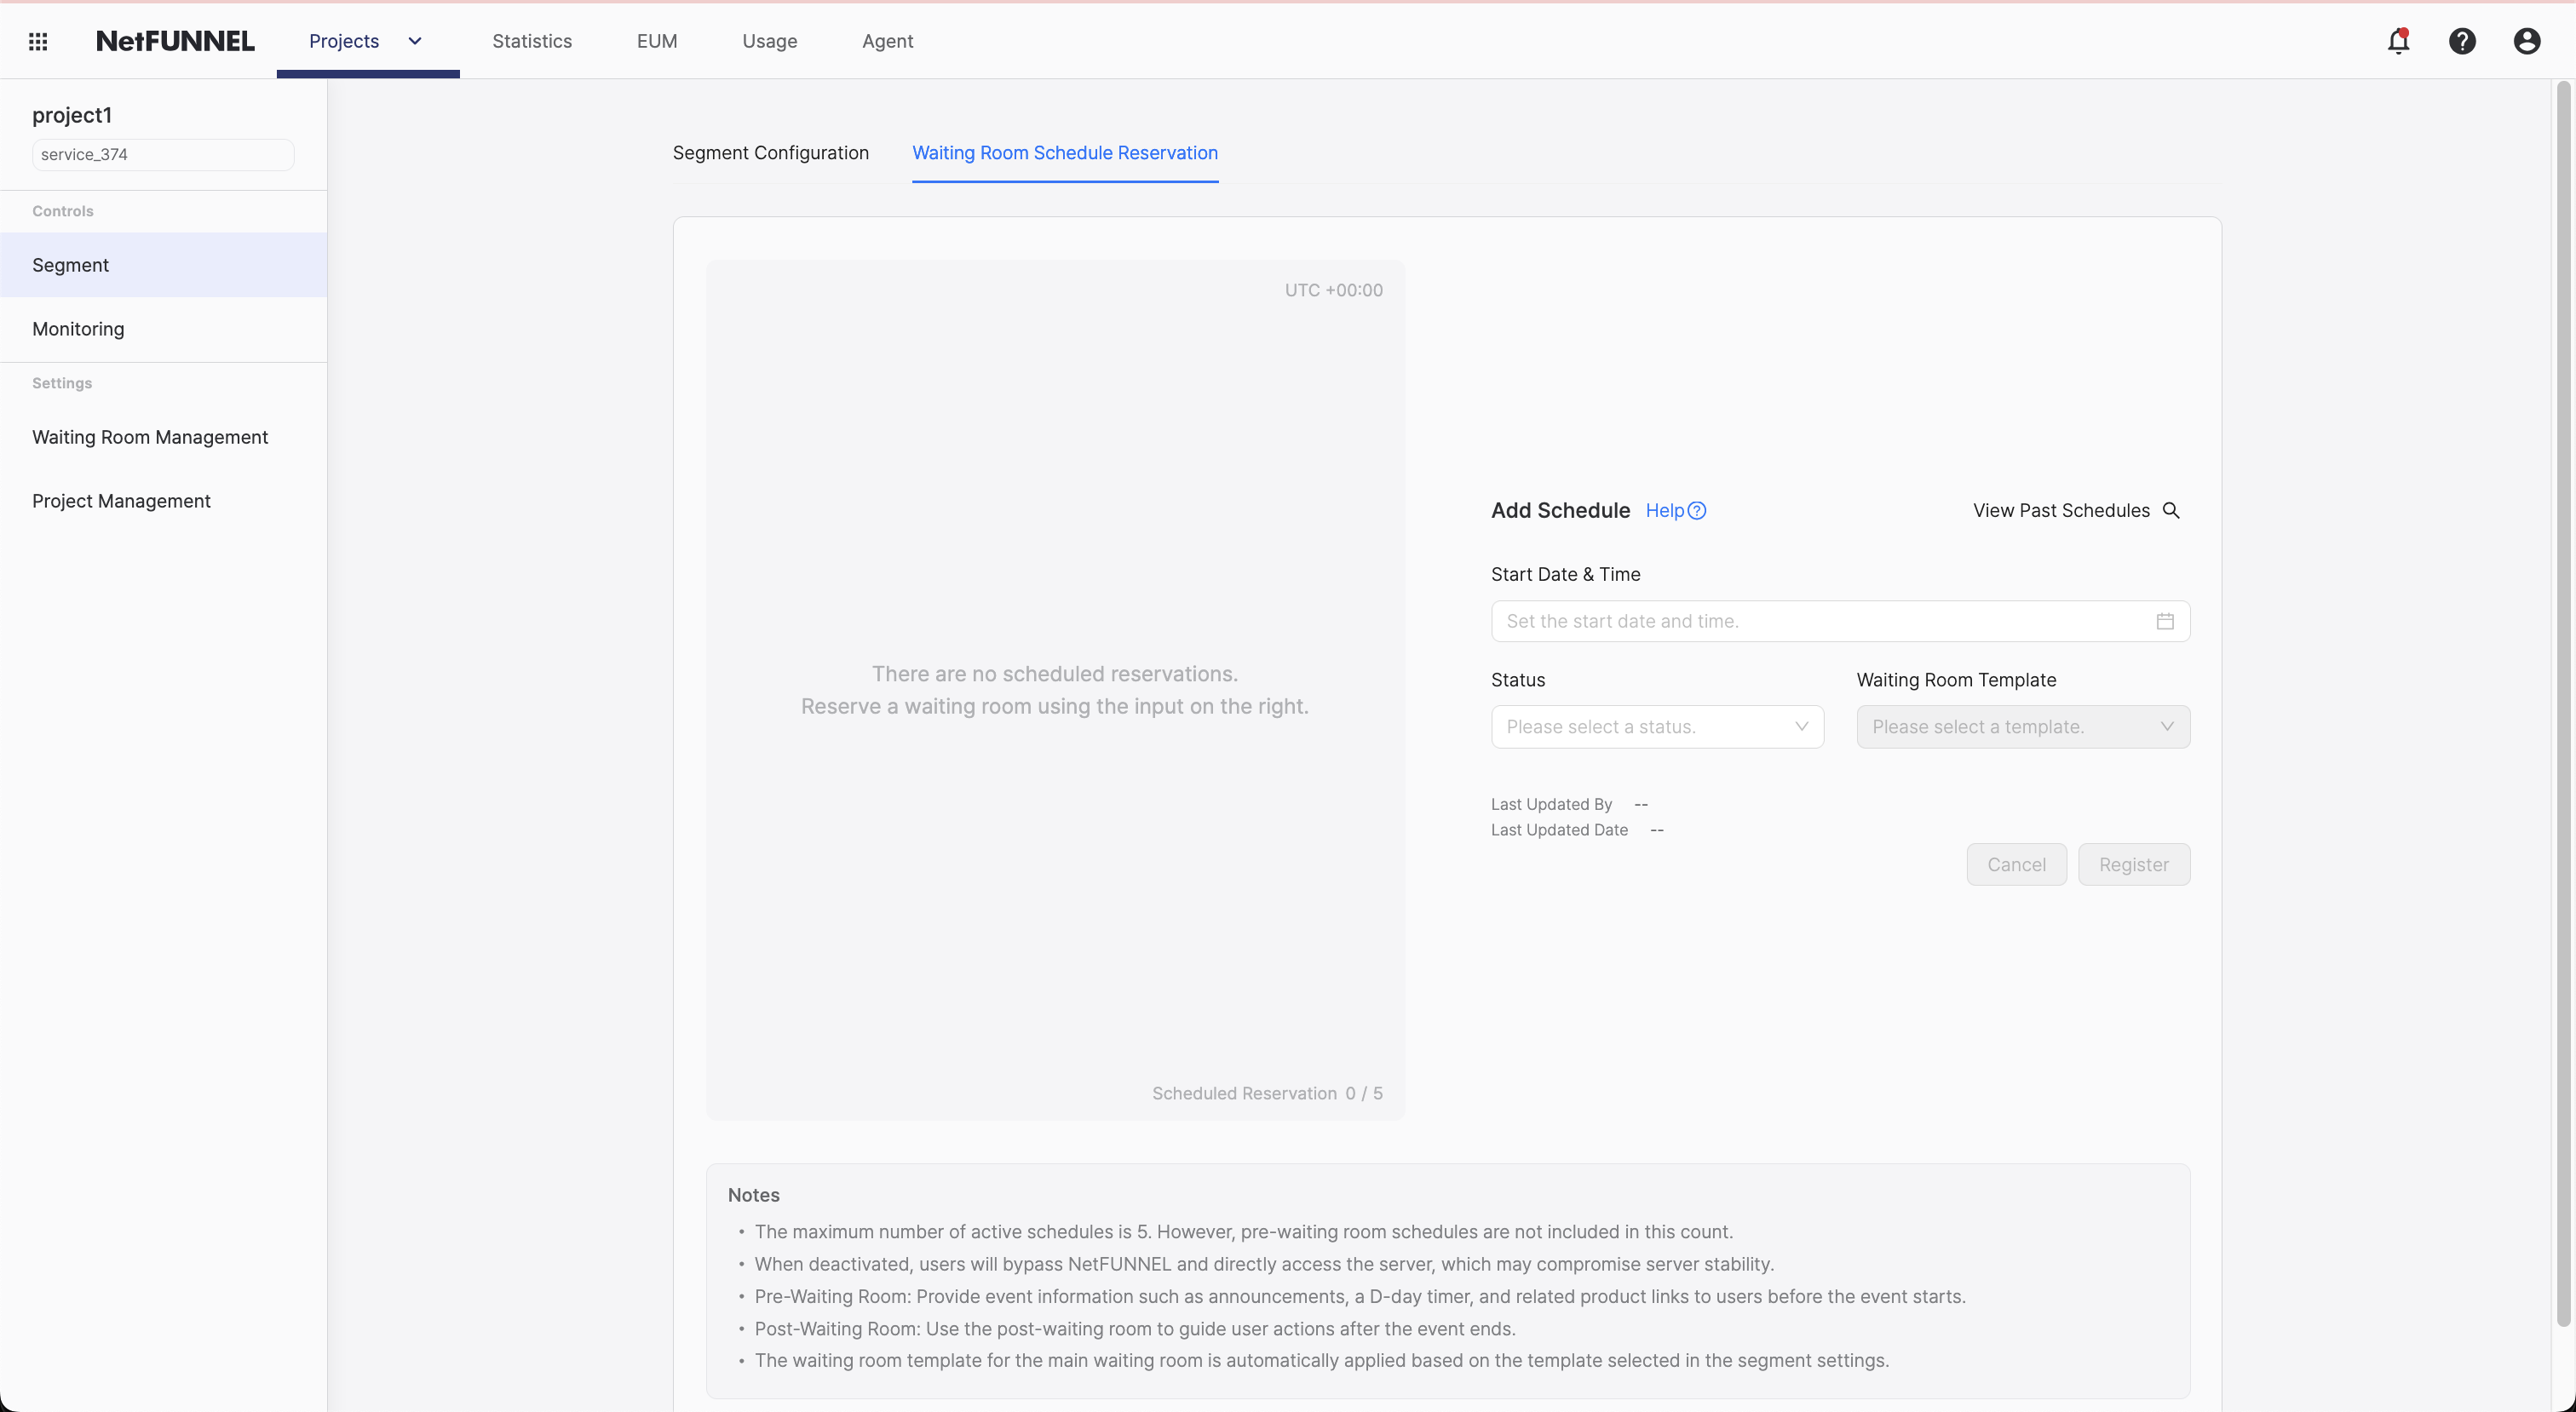
Schedule registration is available starting at least 2 minutes after the current time.
Waiting status
On the [Waiting status] tab, configure the following.
- Start time
- Date and time: Select the date and time when the schedule runs (separate UTC configuration available, see Time zone settings)
- At this time, the corresponding waiting room is activated.
You can define a single schedule even when the window spans midnight (for example from late night into the next morning).

-
Repeat settings
- If you want waiting rooms to be created repeatedly, turn the toggle ON and choose whether to create the waiting room daily, weekly, or monthly.
- During the repeat period, waiting rooms are created on the interval you set.
-
Segment status
- Choose whether to enable NetFUNNEL features during this schedule.
- If disabled, all NetFUNNEL features are turned off and server stability cannot be guaranteed.
After creating a NetFUNNEL disable schedule, make sure to enable it again.
- Waiting status
- Select the waiting room you want for this schedule among main waiting room, pre-waiting room, and post-waiting room.
- You can pick a template you created beforehand from the template dropdown to customize.
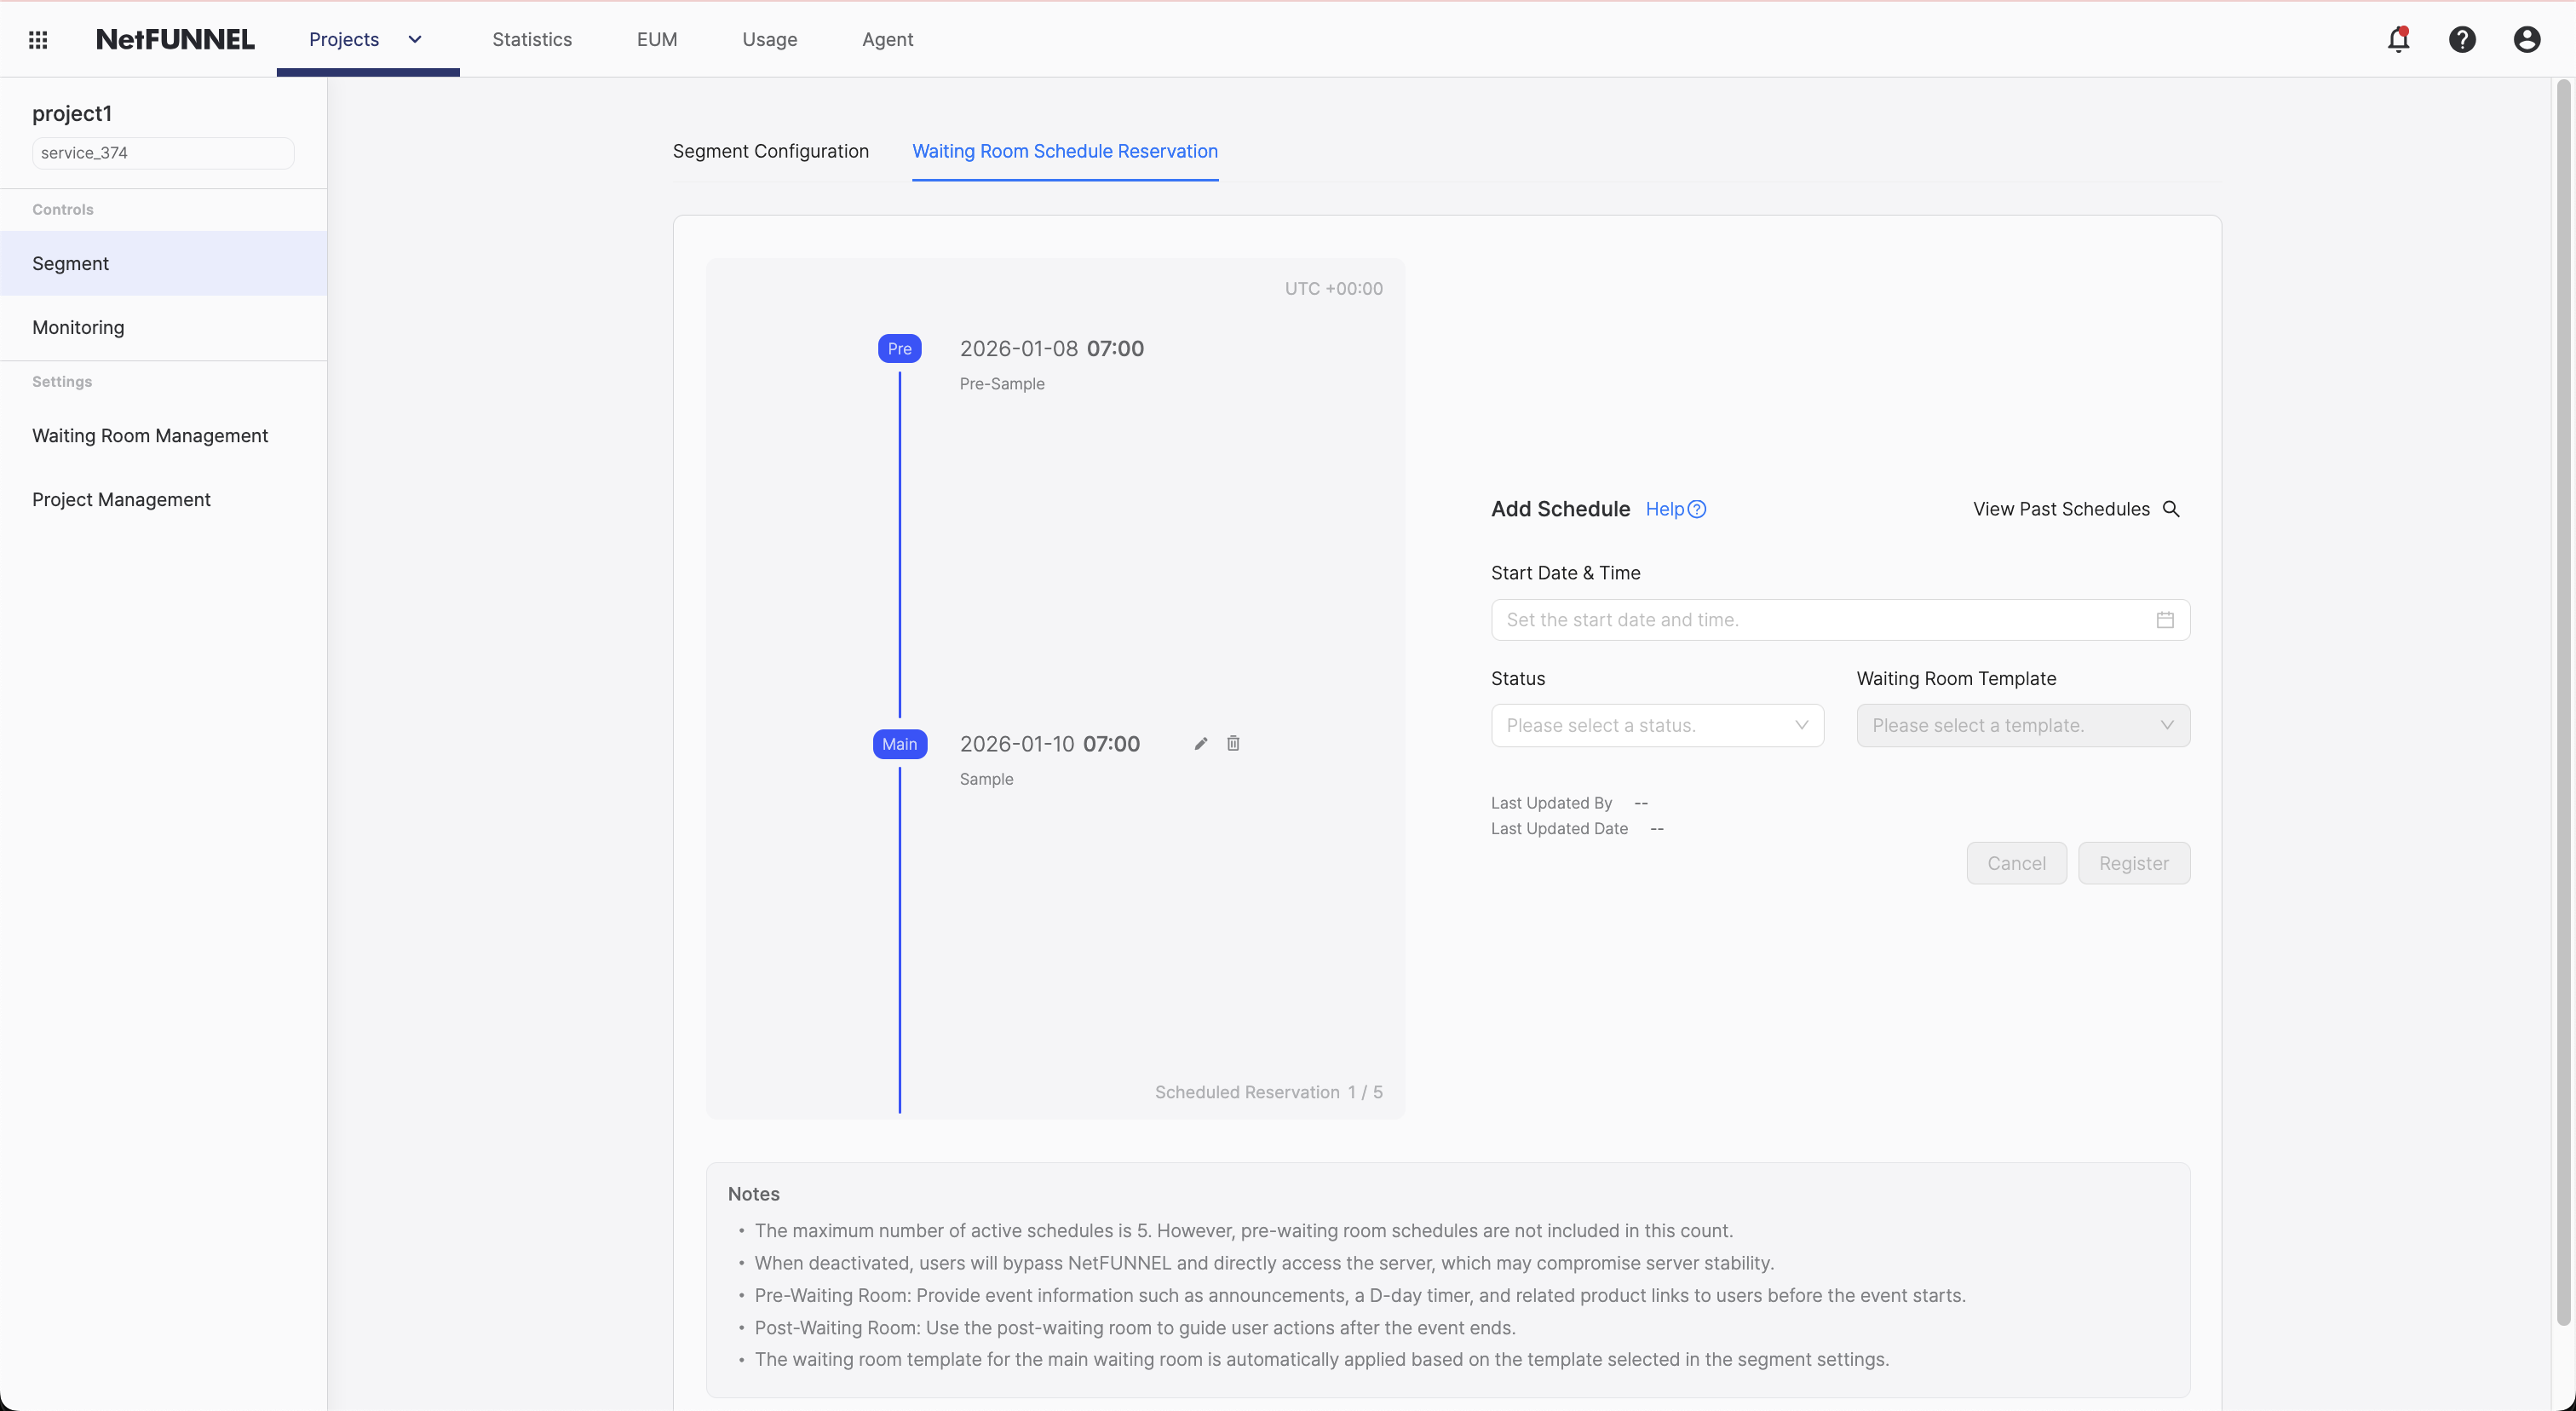
Examples:
- 2026-01-08 07:00 - Status: Pre-waiting room, Template: Pre-Sample
- 2026-01-10 07:00 - Status: Main waiting room (Template: Sample, auto applied)
Admission limit
On the [Admission limit] tab, you can schedule automatic changes to admission limit (concurrent users) at specific times. This feature allows administrators to flexibly control server entry without staying online, according to the configured time periods.
Configure start time and repeat settings the same way as on the [Waiting status] tab, then specify the admission limit to apply during that time period.
You can register up to 20 schedules per segment. (Up to 10 waiting status schedules, up to 10 admission limit schedules)
If the schedule has repeat settings, it is counted as a single schedule regardless of how many times it repeats.
If pre-main waiting rooms are linked, the schedule is displayed separately in the reservation settings list but is still counted as 1 schedule.
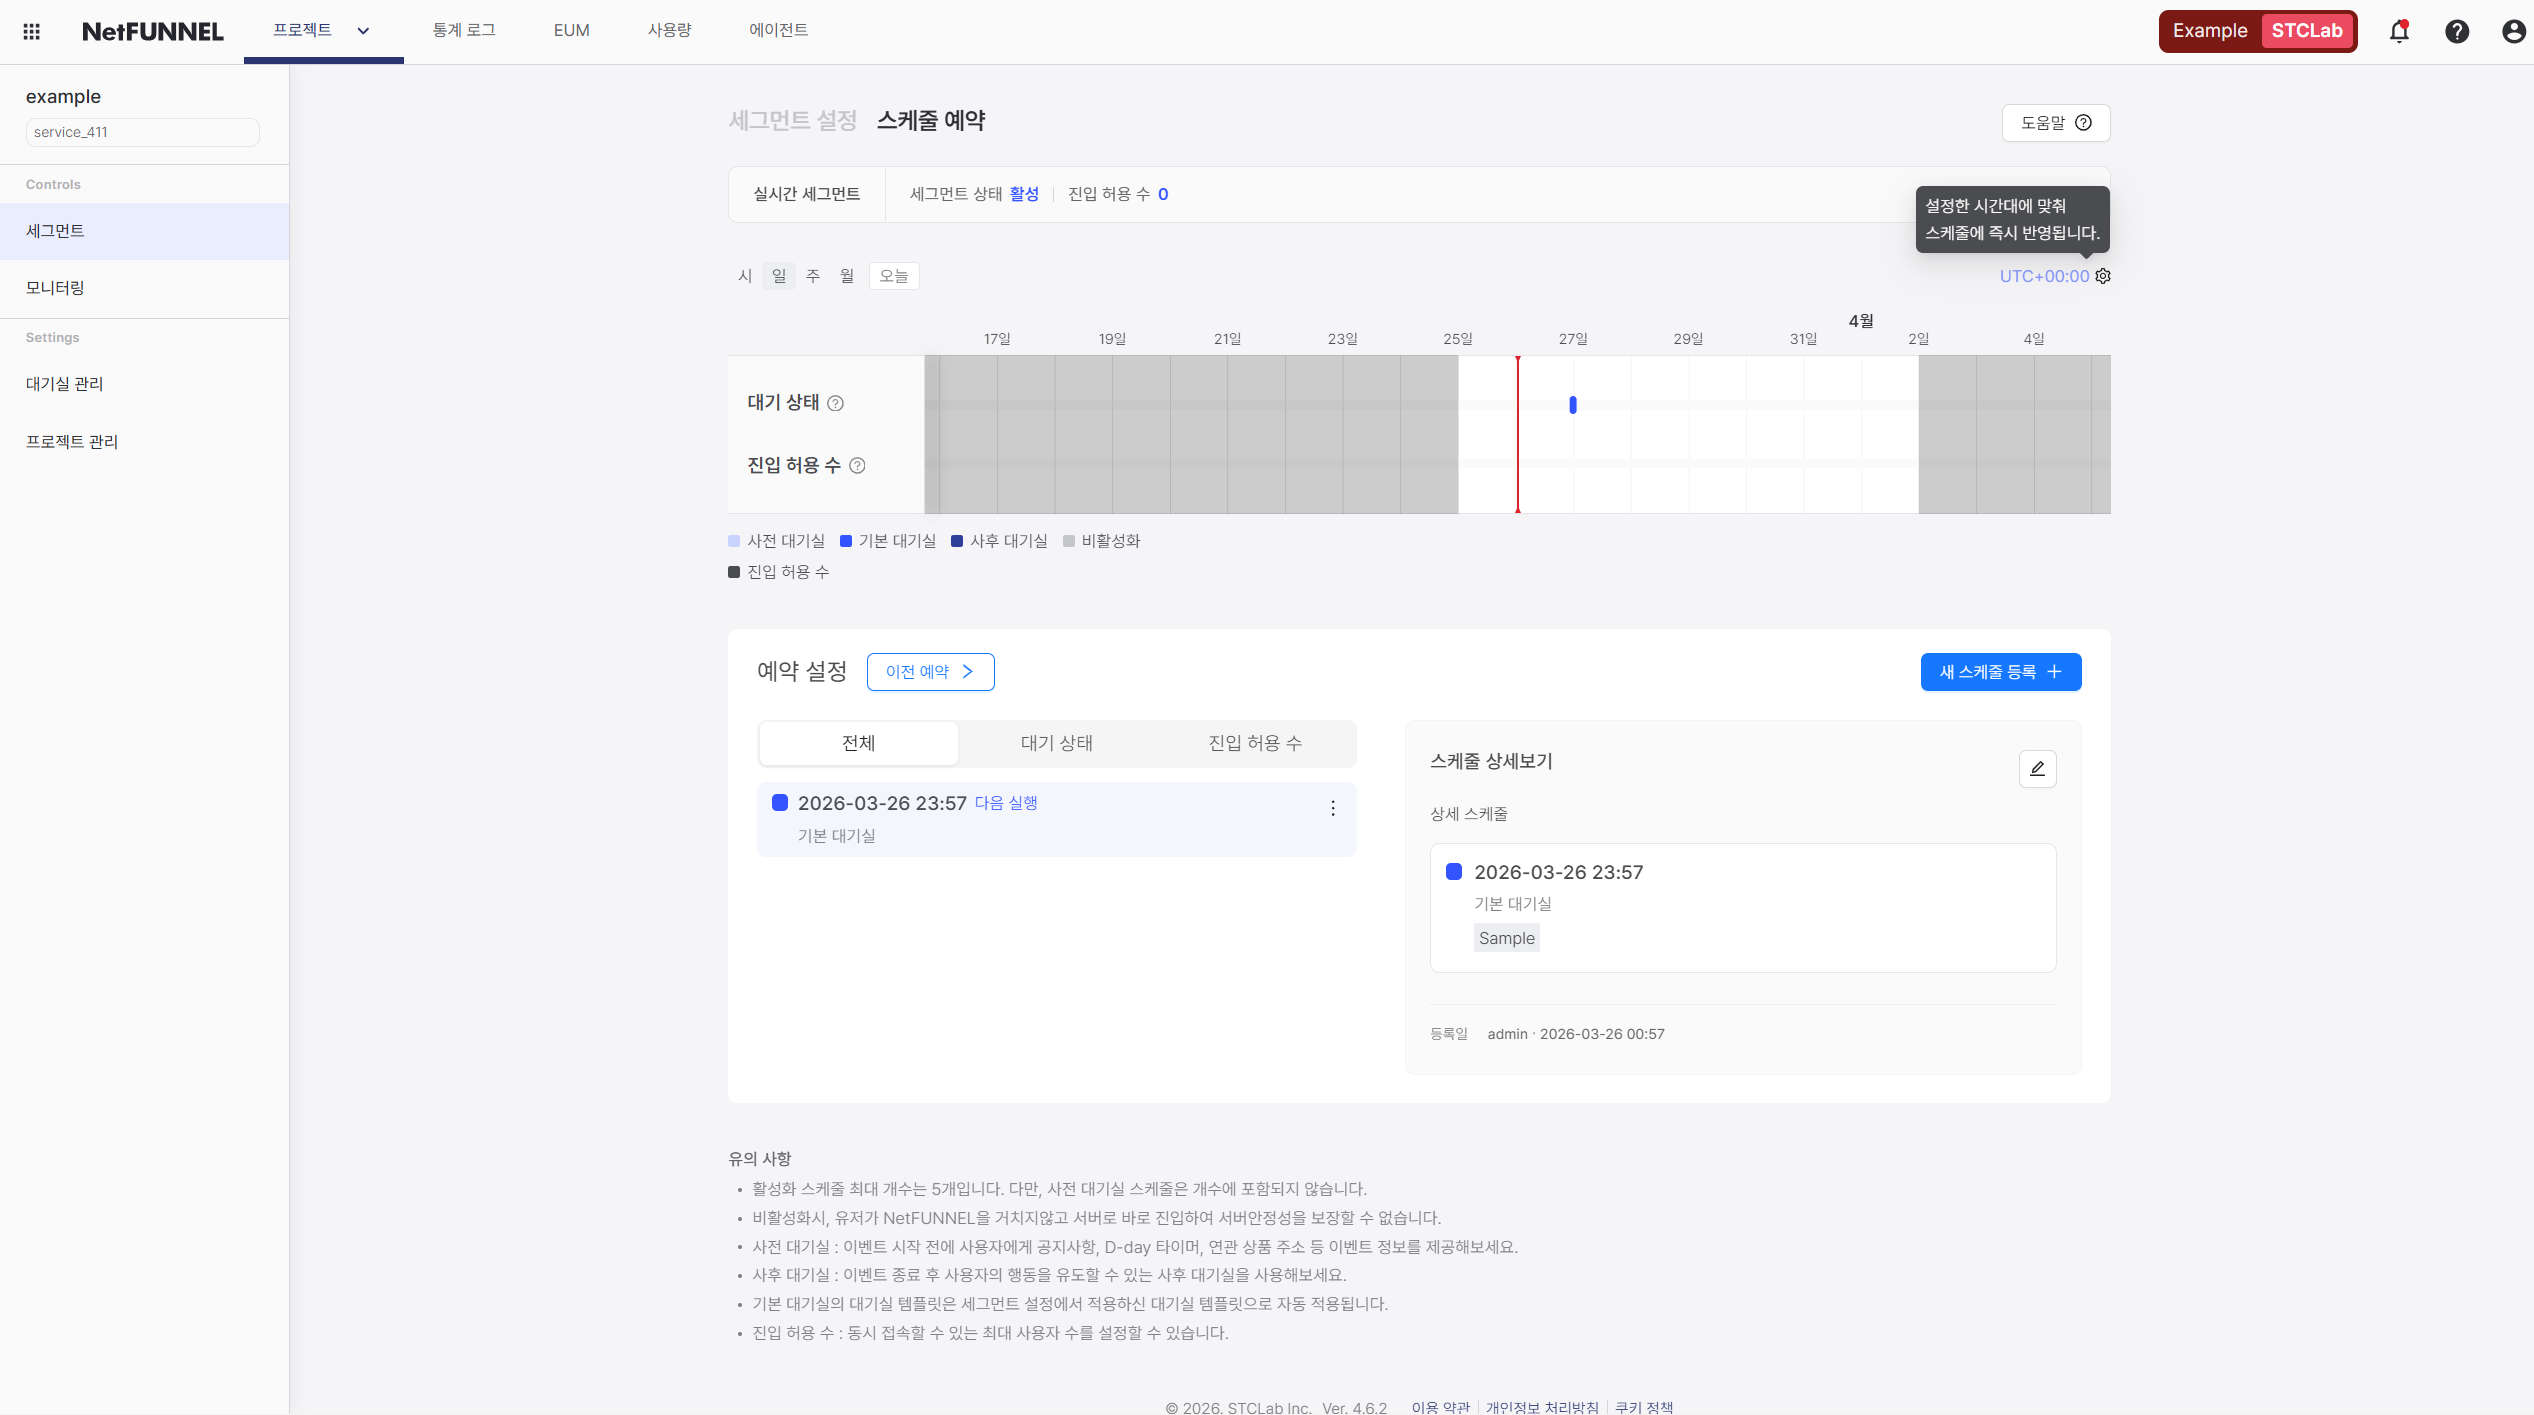
Schedule verification
The schedules you create can be viewed in the central [Timeline] or in [Reservation settings] on the [Schedule reservation] page. If you use the [Previous reservation] feature in [Reservation settings], you can also check the history of waiting rooms that were executed previously.
You can also check registered schedules on the segment list screen.
Schedule count display: The segment list shows how many schedules are registered per segment.
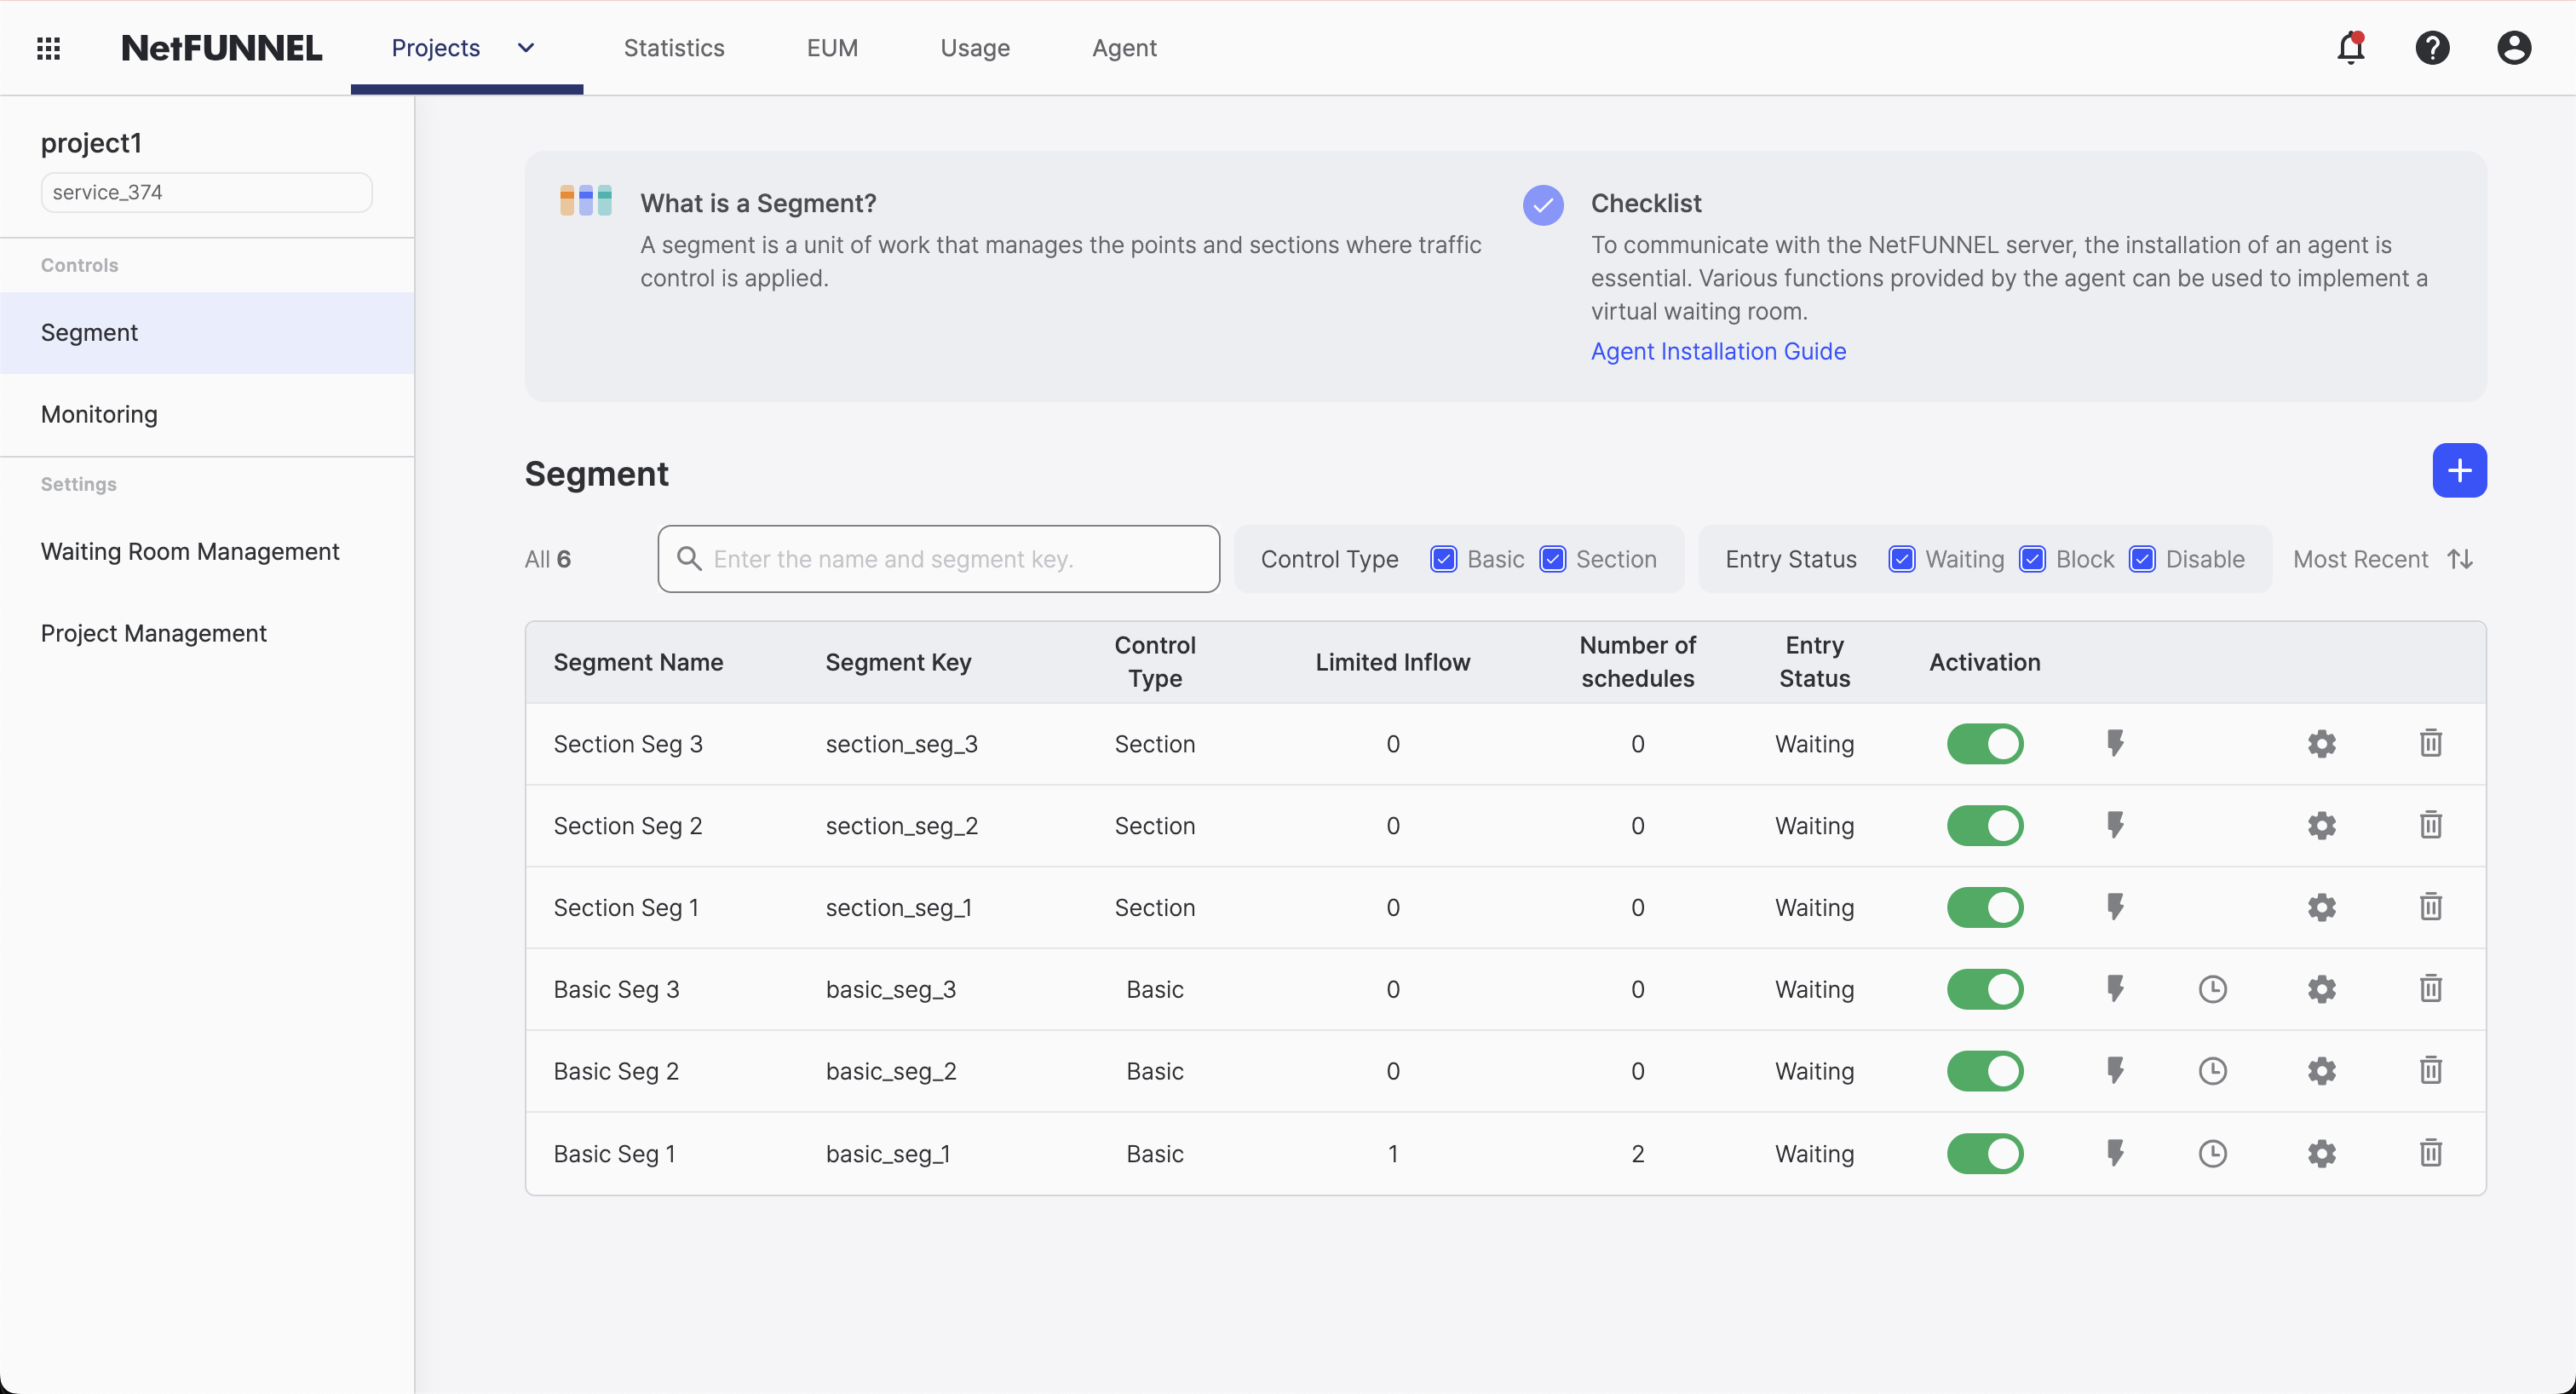
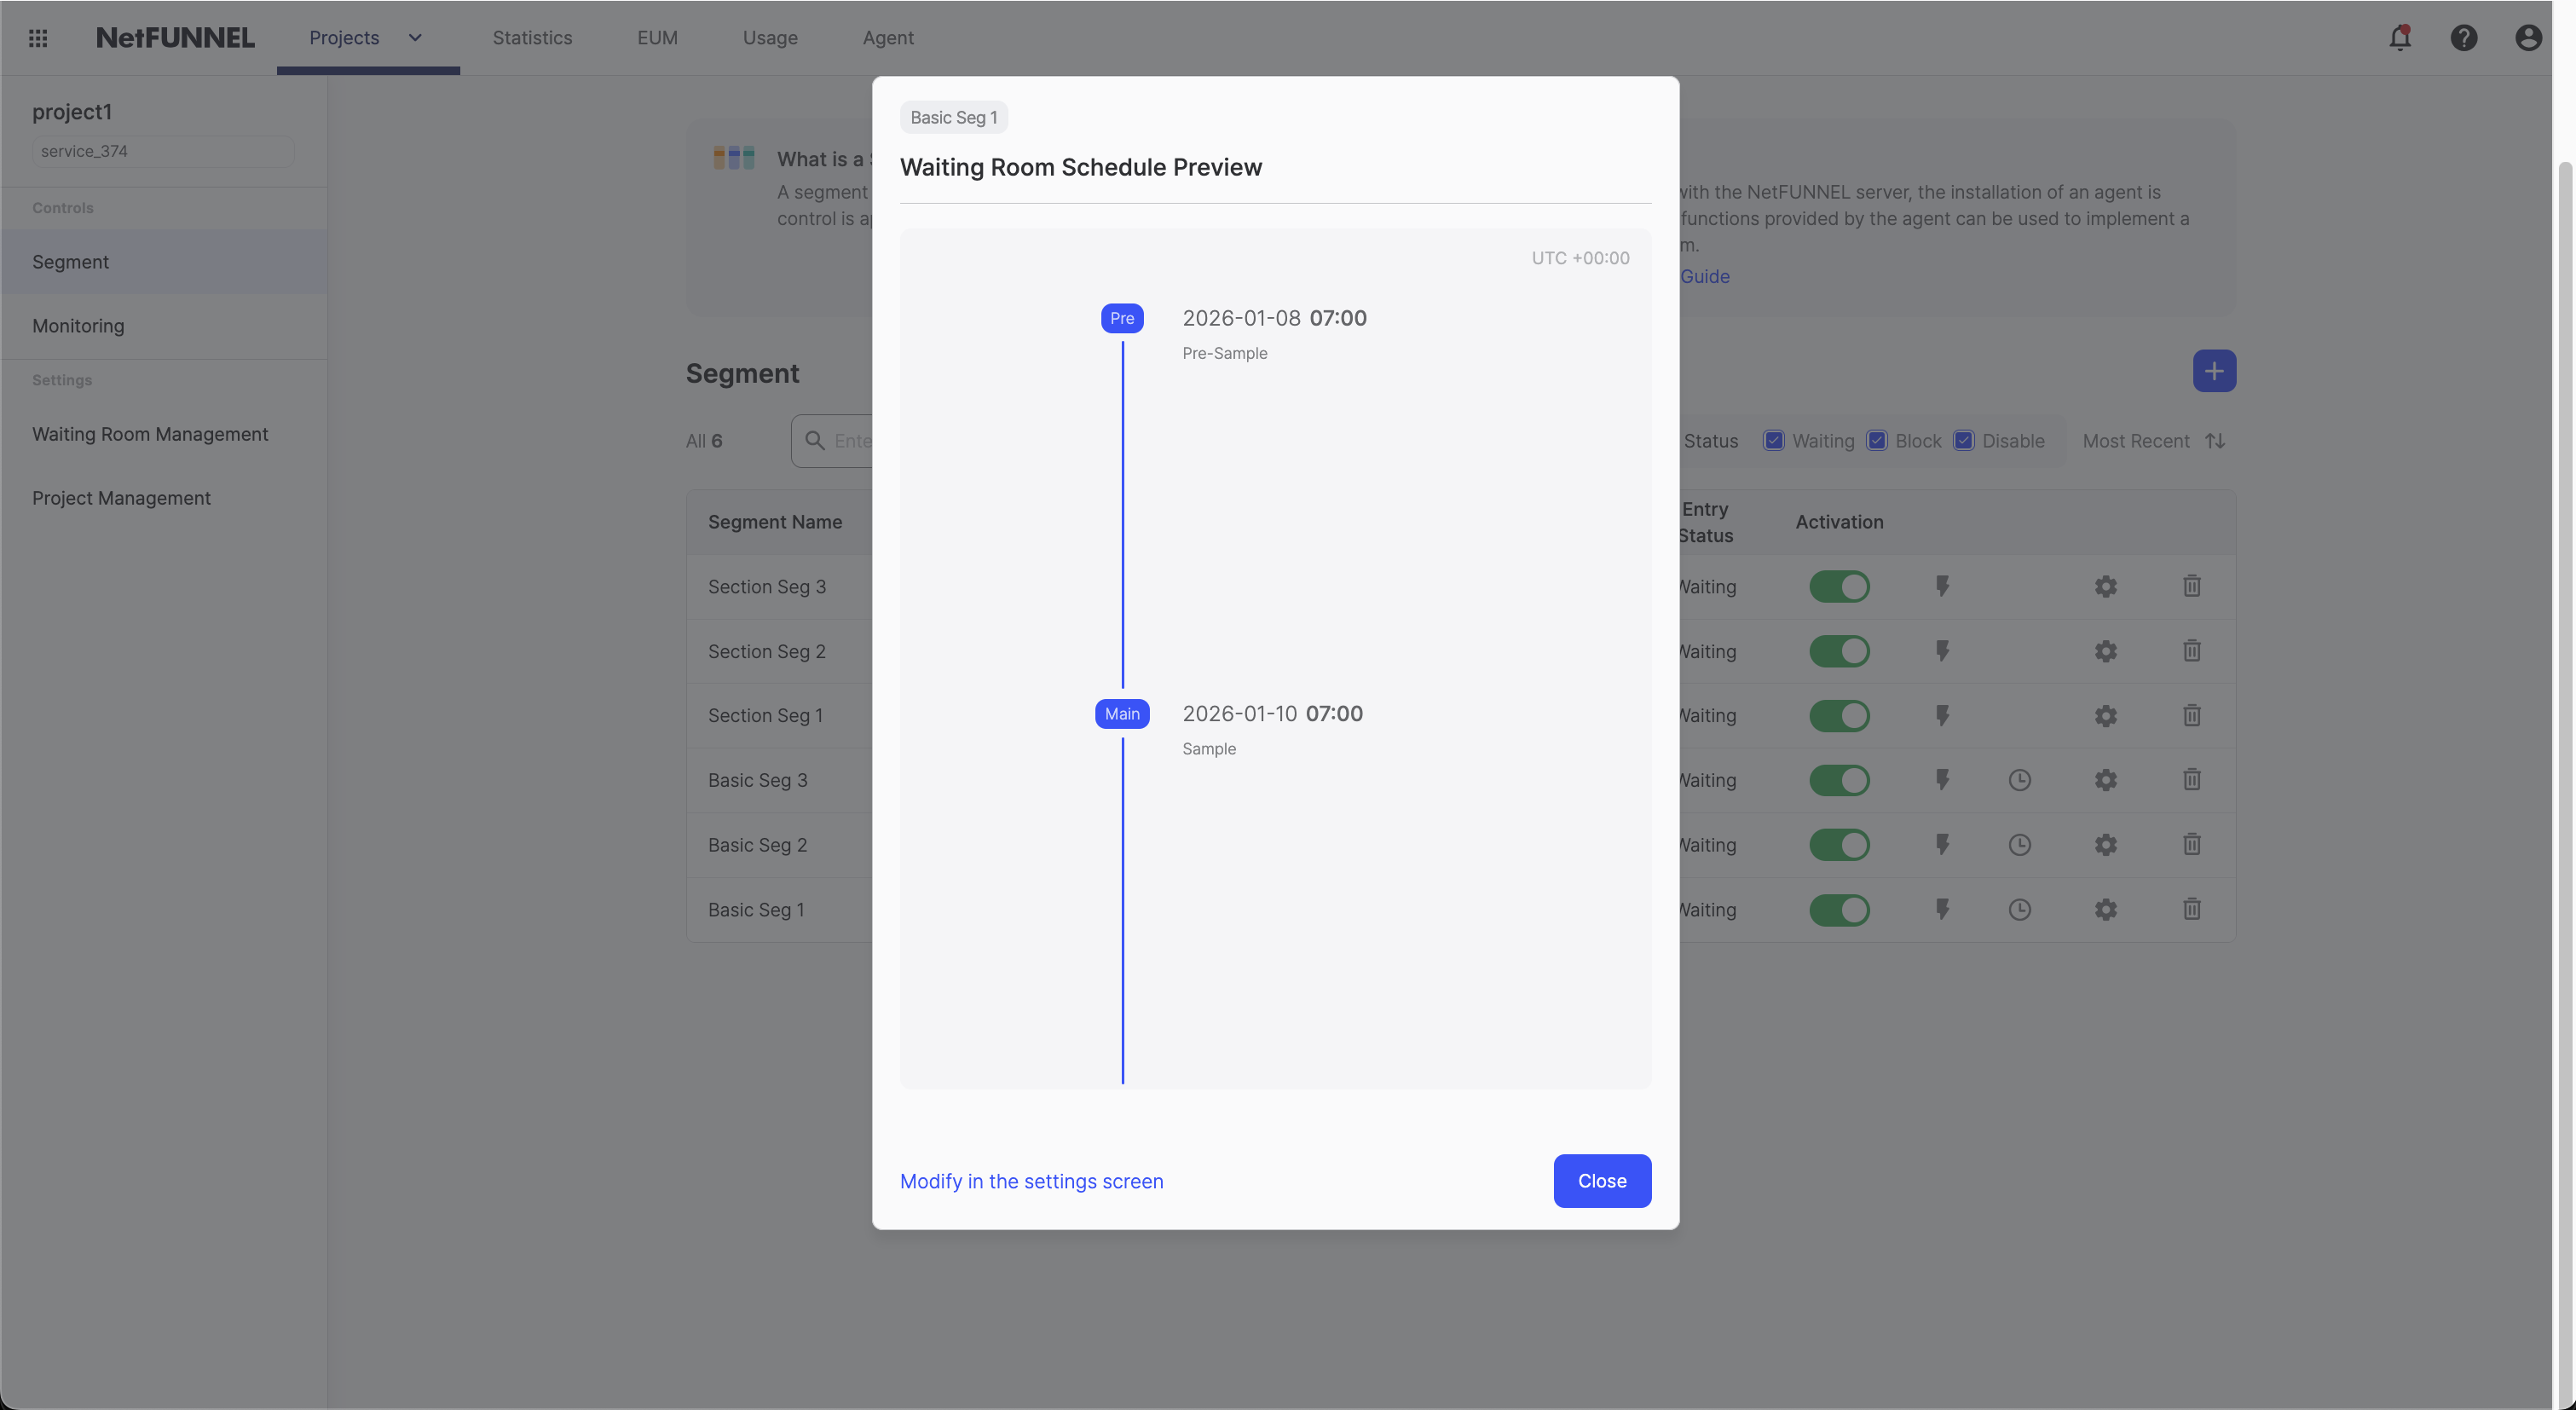
Schedule preview: Click the clock icon on the segment list to preview registered schedules.
![]()
Clicking the clock icon displays the waiting room schedule preview dialog. You can check the list of registered schedules in the dialog, and click the [Go to Schedule reservation] button to move to the schedule edit screen.
Schedule edit and management
Hover over the markers in the central [Timeline], or read the [Reservation settings] list to check detailed information, and then click a schedule to edit or delete it. Schedules that have already been executed cannot be edited or deleted. You also cannot modify the waiting status (for example, main waiting room) and template for schedules that are scheduled to run within the next 2 minutes.
Editing a schedule:
- Change execution time (at least 2 minutes after the current time)
- Change status (select among main waiting room / pre-waiting room / post-waiting room / Disabled)
- Change waiting room template (when the status is pre-waiting room or post-waiting room)
- Repeat settings feature
If you delete a schedule, no waiting room transition occurs at that time, and the state from the previous schedule is maintained.
Time zone settings
NetFUNNEL provides the ability to set a time zone independently for each segment, separate from the account's default settings. Therefore, before reserving a schedule, make sure the UTC-based time zone applied to the timeline matches the actual service region.
The initial value follows the account time zone set in the console, but you can change it in the [Schedule reservation] UTC setting.
If you operate a global service in a different time zone from the console settings,
please adjust the time zone setting (for example, UTC+09:00) in the top-right corner of the timeline to match the service region before reserving the schedule.
For smooth event execution, run an operational test of waiting room schedules in advance. Create a temporary schedule with a test waiting room, then check the following:
- Verify that the waiting room is displayed normally at the reserved time
- Verify that all links and content in the waiting room template work
- Verify that the intended design is displayed on mobile phones and tablets
- Verify that queue numbers appear correctly while waiting
For advanced configuration options and integration details, see Basic Control segment overview and Basic settings.